|
All About
Sprouting
Seeds, Nuts, Beans and
Grains

Sprouts are a wonder food!
Scientists have studied sprouts for centuries to better understand
their high levels of disease-preventing phytochemicals, and how they
contribute to better health, from prevention to treatment of
life-threatening diseases. Major organizations including the
National Institutes of Health, American Cancer Society and Johns
Hopkins University have reinforced the benefits of sprouts with
ongoing studies that explore various sprout varieties for their
nutritional properties and to validate health claims.
Sprouts are better for you than the seeds and plants they come from,
and contain more of the enzymes which helps protect cells and
prevents their genes from turning into cancer. Studies have shown
that sprouts contain significant amounts of vitamins A, C and D.
Sprouts are widely recognized by nutrition conscious consumers and
health care professionals as a “wonder food.”
Want to learn how to grow sprouts? Read on!
Following are basic directions to grow sprouts from nuts, seeds and
beans.
Sprouting
Tips
Remember that germination declines with
time. Keep an eye on your sprouts to see when they are full
and ripe.
When seeds have soaked and have not sprouted well they can still be prepared in other
ways.
The longer sprouts grow the more flavor they have.
Sprouts grow bitter as green chlorophyll develops. Keep
refrigerated after sprouts are ready to eat.
Add to salads, decorate dinner plates, garnish buffet bars, and use
in soups.
Growing is like a work of art, it doesn't always result in
perfection.
Sprouting Jar
Method for Growing Sprouts

(Alfalfa Seeds)
Place seeds, nuts, grains or beans in a jar and cover with room temperature water.
Soak 8 hours.
Drain and rinse twice a day for the specified numbers of
days listed below for each seed, grain, nut or bean.
A quart canning jar works well. There are sprouting screen lids
you can purchase that fit on wide mouth canning jars. Or you
can cover the opening of the jar with
cheesecloth and secure with screw-on canning jar band ring.
(There are many other varieties of sprouting containers
on the market as well. These include stacking trays, bag
sprouters, tray sprouters and many more.) A simple jar works
well and most folks have one of these handy in their kitchens.
After the seeds, nuts, grain or beans soak in water, strain off the water and let the seeds sit. You want the seeds to be
wet and to have access to air. Therefore, don't let the seeds gather
in clumps at the jar's bottom. In fact, take advantage of the fact
that the wet seeds want to cling to the jar's inside surface. Roll
the jar around, causing as many seeds to stick to the surface as
possible, then lay the jar on its side. If the surrounding air is
cooler than 70 - 80 degrees, the seeds will grow too slowly. Warmer
temperatures encourage disease organisms. If you prefer growing them
under warmer conditions, then rinse at least twice a day or more. If
you are not rinsing enough, you'll smell a funky odor in the jar. At
this stage it doesn't matter whether your sprouts have light or not.
Rinse the seeds at least every 24 hours with cool water. Just run the
water into the jar, swirl the seeds around, then pour (strain) out the water
and repeat. The idea is to rid the seeds of disease organisms
and toxins that accumulate in the warm, moist conditions inside the
jar. The picture on the top shows sprouting alfalfa seeds stuck to
the side of a jar. The picture below shows the same jar. You can see that the small amount of seeds we began
with now fill the jar with half-grown sprouts. At this point I
poured half of the sprouts into another jar and continued rinsing
them. Eventually both jars were full!
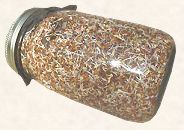
(Alfalfa Sprouts)
When the sprouts are big enough -- usually on the fifth or sixth day
-- spread them out and let the
sun shine on them a few minutes -- maybe 15 minutes, more if you
want. This important step activates enzymes and makes the sprouts
prettier by making their leaves greener. The brown seed-coats will
have come off most beans. If you want, you can remove most of the
coats by submerging the sprouts in water, then filtering out the
coats, which tend to float to the top. Removing the coats won't
change the taste or nutrition.
Eat the whole sprout. In salads, soups, baking or plain.

Alfalfa Seeds
3-5 days
alfalfa sprouts are the most common sprouting seed
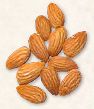
Almonds
24 hour maximum

Chick Pea / Garbanzo
48 hour maximum
Almonds and Garbanzo's may not sprout all the time.
Use anyway soft and un-sprouted!
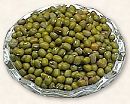
Mung Beans
2-3 days

Green Lentils
2-3 days

Green Whole Peas
2-3 days

Natural Sesame Seeds

Sunflower
Sesame & Sunflower seeds soak for only 2 hours, sprout 24 hours
maximum.

Hard Wheat Berries
2 days

Soft Wheat Berries
2 days

Buckwheat Grouts
(1 cup in quart jar, soak 15 minutes and drain)
Wheatberry and Buckwheat Groats rinse and drain every 10 minutes for 1 hour,
and then every 12 hours rinse and drain about 1 day until sprout is
length of seed
Flavorful Sprouting Seeds
Add small amount to other
sprouting grains for more flavor. Or use sprouts sparingly in
dishes.

Anise Seed
2 days

Caraway Seeds
2 days

Dill
2 days

Fennel
2 days

Fenugreek Seed
2-5 days
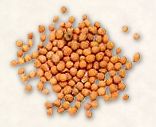
Mustard Seed
2-4 days
Plate Sprouting
To sprout, place one layer on bottom of plate.
Mist 3 times a day for 24 hours maximum. Eat the whole sprout.
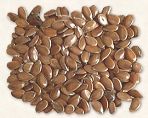
Brown Flax Seeds

Quinoa
Becomes bitter with longer sprout times.
Tray Sprouting
For grass or strait upright sprouts.
With the tray method the seed is not eaten, the grasses are.
This is how folks make wheat grass juice. The grass is grown,
cut and juiced.
Fill tray 1 inch deep with perlite (do not eat). Sprinkle seed upon
the perlite.
Spray 3 times a day with water. Grow for specified days. Cut sprouts
for salads, etc.
Buckwheat
5 days
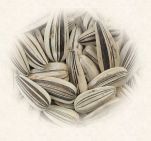
In Shell Sunflower
7-8 days - Needs lots of water.
Hard Wheat Berries
7 days
Soft Wheat Berries
7 days
~Written and contributed by Susan Oshel
who has grown and tasted all of these~
|